15 Clever Floating Shelves Ideas for Small Apartments That Max Out Every Inch
The best floating shelves ideas for small apartments share one thing in common: they treat your walls like the storage goldmine they are. In a 600-square-foot apartment, every inch counts — and blank walls above your counters, beside your bed, and in that dead corner you walk past every day are quietly wasting some of your most valuable real estate.
Floating shelves add storage without eating into your floor space, make rooms feel taller, and give you somewhere to put all the things that currently live on your counters, dresser, and kitchen table. Done right, they look intentional and designed. Done wrong, they become cluttered ledges that make your apartment feel smaller, not bigger.
This guide covers 15 specific floating shelf ideas for small apartments — room by room, renter-friendly installation options, styling principles that actually work, and the mistakes to avoid so yours look like a decorator was involved instead of just someone with a power drill and good intentions.
Whether you’re working with a studio, a one-bedroom, or a tiny kitchen with nowhere to put your coffee mugs, there’s a wall shelf strategy here that fits your space — and your lease.
Sorbus Floating Shelves — 2-Pack, Natural Rustic Wood with Raised Edges
- Raised edges keep items from falling
- Natural rustic wood finish
- Up to 22 lbs capacity each
- Great for corner plants and entryways
* As an Amazon Associate, ApartmentNook earns from qualifying purchases at no extra cost to you.
Entryway Floating Shelves: The $30 Fix for a Chaotic Front Door
nn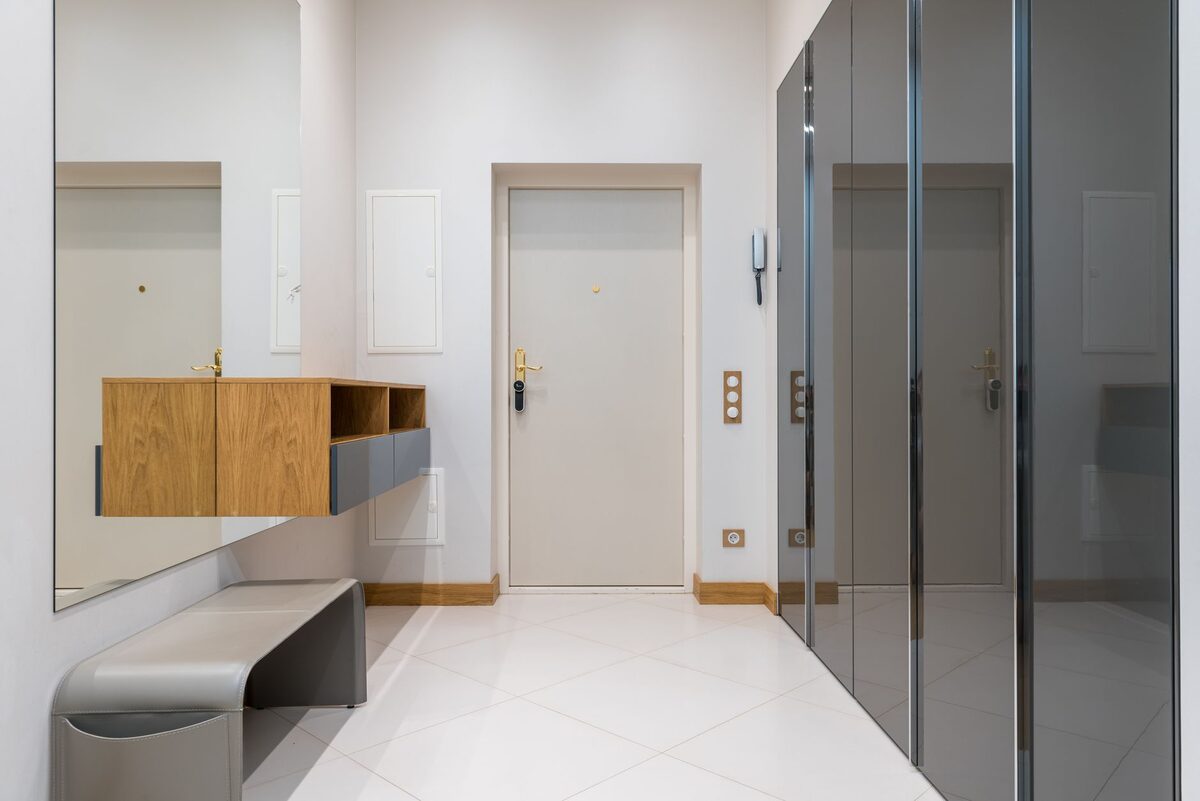
Most apartment entryways have one thing in common: a pile of stuff on the floor beside the door. Keys, shoes, bags, mail, a jacket that didn’t make it to the closet. The reason isn’t laziness — it’s that there’s nowhere to put things when you walk in the door. A single floating shelf fixes this immediately.
Mount an 8-inch deep shelf at waist height — roughly 36 inches from the floor — directly beside or above the door. This becomes your landing strip: the place your keys go the moment you walk in, where your mail lands, where your sunglasses live. You stop losing your keys because they have a home, and the pile on the floor disappears because there’s a better option one shelf-height up.
Here’s how to build out a complete entryway floating shelf system in a small apartment:
The landing shelf: A single shelf at waist height with a small tray or dish on it for keys, a candle, and a small plant. Keep it minimal — three items maximum so it doesn’t become another clutter magnet.
The command center: A slightly taller shelf at eye level holds a small basket for mail and a framed print of your weekly to-do list or a calendar. This turns the entryway wall into a functional information zone rather than a decorative afterthought.
Below the shelf: Pair the floating shelf with three or four hooks mounted directly below it on the same wall. The shelf holds flat items; the hooks hold bags, scarves, and your most-worn jackets. This combo eliminates the need for a bulky coat rack or hall tree — both of which eat significant floor space in a small entryway.
The shoe shelf: A low shelf at 12 to 14 inches from the floor beside the door holds two to three pairs of shoes that you cycle through regularly, keeping them off the floor and easily accessible without a shoe cabinet. Pair this with a small basket below for less-worn pairs.
For renters who can’t drill into walls or need to minimize wall damage, the entryway floating shelf is one of the best places to try a Command strip-mounted option. The items on it are typically light — a tray, a small plant, a candle — and Command strips handle that weight easily. We have a full guide to renter-friendly decor ideas that need zero drilling if you want more no-damage options beyond shelves.
How to Hang Floating Shelves in an Apartment Without Damaging Walls
The most common concern with floating shelves in a rental is wall damage. Specifically: will the holes ruin your security deposit? The honest answer is that traditional stud-mounted shelves leave holes that most landlords consider normal wear and tear — but it’s worth knowing all your options so you can choose the right installation method for your lease and your shelves.
Here are the renter-friendly options from least invasive to most secure:
Command strip shelves (no holes at all): Command makes floating shelf systems designed specifically to hang from adhesive strips. These leave zero holes and can hold up to 16 pounds — enough for books, plants under 2 lbs, and small decor items. The limitation is weight capacity: don’t try to hang a full row of heavy hardcovers on Command strips. The strips are ideal for lighter entryway shelves, bathroom shelves for toiletries, and bedroom shelves for a lamp and a few small items.
Steel pin anchors (tiny holes, high capacity): Pin-style wall anchors — sometimes called monkey hooks or gorilla hooks — use a thin steel pin that you press directly into drywall. The hole is smaller than a finishing nail and holds 20 to 35 pounds per anchor. For shelves up to about 30 pounds, two pin anchors are plenty. The holes they leave are small enough that a dot of white toothpaste fills them invisibly on move-out.
Drywall anchors (medium holes, high capacity): Standard plastic drywall anchors create a larger hole than pin anchors but hold 25 to 50 pounds each, making them suitable for heavier shelves stacked with books. These holes require spackle to fill but are straightforward to repair — spackle, sand, and paint, and no one can tell they were there.
Stud mounting (most secure): If you know where the wall studs are — typically 16 inches apart — screwing directly into a stud gives you a hold of 100 pounds or more per screw. Stud holes are easy to patch with spackle. This is the right choice for shelves that will hold significant weight like books, small appliances, or multiple heavy decor pieces.
The rule of thumb: match your installation method to your shelf’s intended load. Command strips for light display shelves. Pin anchors for medium-weight shelves with plants and decor. Drywall anchors or stud mounting for shelves that will hold books or anything heavy. And when you move out, every type of hole listed here is patchable — spackle and a small paint brush handle all of them in about 20 minutes.
One last tip: always use a level. A shelf mounted even half an inch off-level will look noticeably crooked in daily life, even if it didn’t during installation. A $10 bubble level from any hardware store saves you from this specific frustration. According to home improvement best practices, checking for wall material before drilling is also essential — some older apartment buildings have plaster walls rather than drywall, which require different anchor hardware.
How to Style Floating Shelves Like a Designer
nn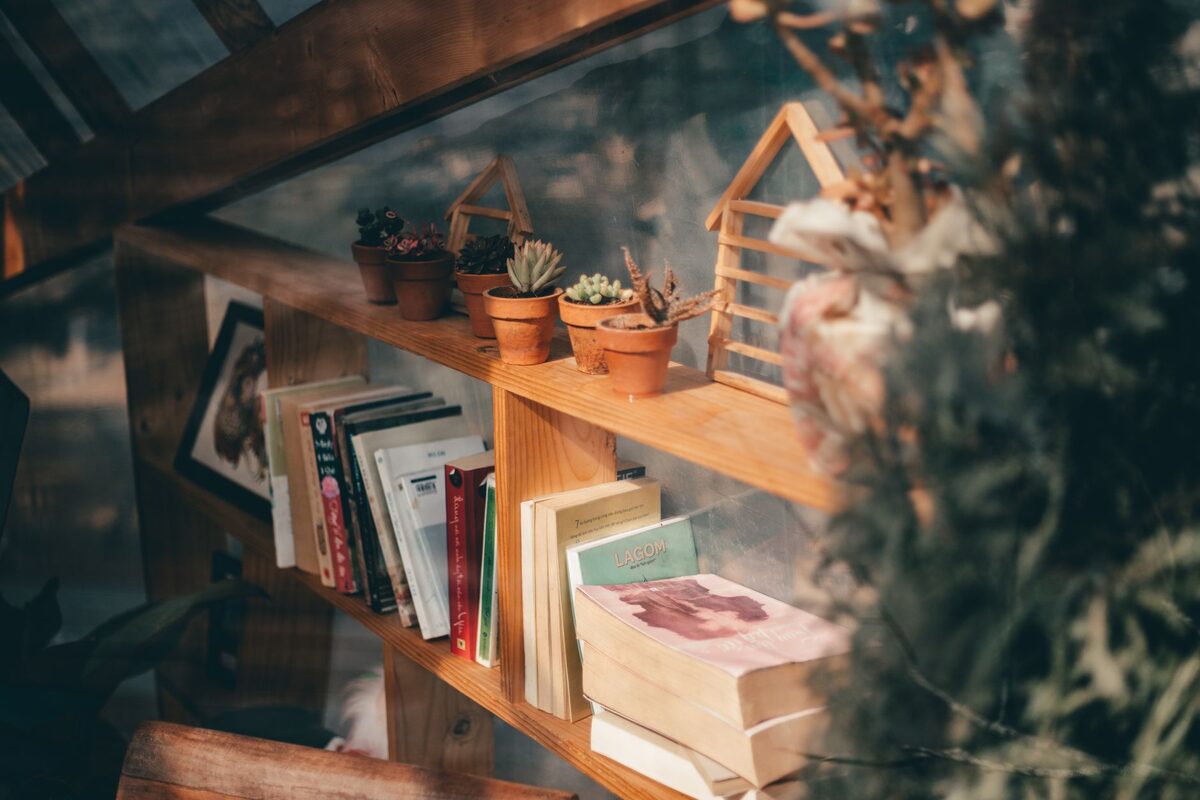
Getting the shelves up is the easy part. Getting them to look styled rather than cluttered is where most people get stuck. The difference between a floating shelf that looks like a design feature and one that looks like a storage overflow zone comes down to a few specific principles.
Use the rule of three: Group items in odd numbers — three is the magic number for shelf styling. A plant, a book stack, and one decor object (a small sculpture, a candle, a ceramic bowl) reads as intentional. Two items feels incomplete; four items starts feeling crowded. On a single shelf, aim for one group of three and one area of intentional negative space.
Vary the heights: If everything on your shelf is roughly the same height, the arrangement reads as flat and uninteresting. Mix a tall item (a floor lamp, a tall vase, a stack of books) with a medium item (a medium plant, a framed print) and a low item (a small ceramic dish, a short candle). The variation creates visual rhythm.
Leave negative space: The most common shelf-styling mistake is filling every inch. Empty space is part of the design. If your shelf feels cluttered, remove two or three items before adding anything new. In a small apartment, negative space on shelves makes the room breathe — and a room that breathes feels bigger.
Repeat colors and materials: Choose two or three tones that appear throughout the shelf — warm wood, terracotta, and cream, for example — and repeat those tones in different items at different heights. The repetition creates cohesion. When a shelf has six different color families represented, it reads as random. When it has three colors returning in different forms, it reads as curated.
Add at least one living element: A trailing pothos, a small succulent, a sprig of dried pampas grass, or a cutting in a bud vase adds organic life that no amount of ceramic or wood decor can replicate. Living plants also introduce movement — the trailing vines moving gently in air currents — that makes a shelf feel dynamic rather than static. They’re also forgiving: a slightly drooping pothos still looks better than a blank stretch of empty shelf.
Match the shelf to the wall: If your walls are white, a white shelf with white invisible brackets disappears and makes your decor pop. If your walls are darker — charcoal, navy, deep sage — a floating shelf in a contrasting warm wood tone stands out as a design element. The choice should be intentional rather than defaulting to whatever was cheapest or most available.
Floating Shelves for Studio Apartments: A Full-Room Strategy
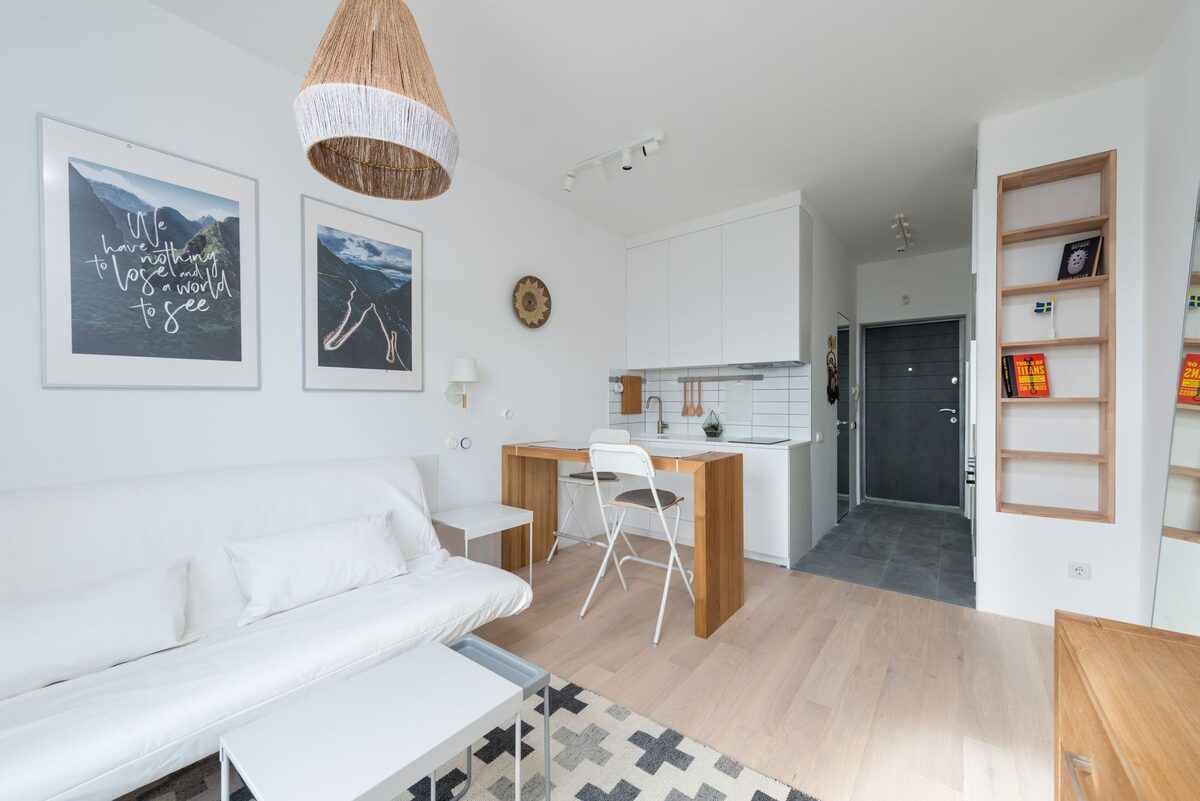
In a studio apartment, floating shelves aren’t just a storage solution — they’re a full-room strategy. With no separate bedroom, the vertical wall space becomes even more critical because you can’t rely on closed-door storage in a second room.
The key to floating shelves in a studio is consistency. When every shelf in the apartment uses the same finish — all warm oak, all black metal, all white — the space reads as a single cohesive unit rather than a collection of unrelated rooms. This is especially important in studios where the living area, sleeping area, and kitchen all share the same visual field.
Here’s how to use floating shelves as part of a whole-studio strategy:
Use shelves to define zones: A cluster of shelves on one wall, arranged vertically from 48 to 72 inches high, visually anchors the “living zone” or the “sleeping zone” — without putting up walls or using room dividers. The shelf cluster creates a focal point that your eye reads as a zone boundary, even in an open space.
Double the function of every shelf: In a studio, every shelf should do two jobs. A shelf in the sleeping zone holds books and a lamp. A shelf in the kitchen holds spices and a trailing pothos. A shelf in the living area holds remotes, candles, and framed photos. No purely decorative shelves that use wall space just to look nice — each shelf earns its spot by adding real storage capacity.
Go high with bedroom shelves: In the sleeping area of a studio, mount shelves at 60 to 72 inches high — higher than you might in a dedicated bedroom. This keeps the sleeping zone visually clear at eye level while still giving you storage above, and it prevents the shelves from competing with the art or decor you might want to see at eye level from the bed.
Use the kitchen wall fully: In a studio apartment with a kitchen that opens onto the living space, floating shelves on the kitchen wall that face into the living area are doing double duty — they store kitchen items and also function as part of the living room decor. Curate these shelves especially carefully: a row of beautiful ceramic mugs, a small herb garden, and a stack of cookbooks looks intentional and designed from both directions.
The studio apartment is also where the choice between open and closed storage matters most. Floating shelves are open storage — everything on them is visible. Plan for this by keeping what’s on display consistently beautiful or consistently organized. Anything that doesn’t meet that standard goes in a basket or a cabinet instead.
7 Floating Shelf Mistakes to Avoid in a Small Space
Even the best shelf becomes a problem if it’s installed or styled incorrectly. These are the most common floating shelf mistakes in small apartments — and what to do instead.
1. Mounting too many shelves on one wall. Three well-spaced shelves look intentional. Seven shelves crammed floor to ceiling look like you ran out of storage options and panic-installed. Stick to two to four shelves per wall in a small apartment — and leave at least 12 inches of vertical space between each shelf so the arrangement breathes.
2. Choosing shelves that are too deep for the room. A 12-inch deep shelf in a narrow hallway or beside a tight doorway creates a hazard — you’ll bump into it daily. Bathroom and entryway shelves should be 6 to 8 inches deep. Living room and bedroom shelves can go to 10 to 12 inches. Kitchen open shelving can go to 12 inches if you have the wall clearance.
3. Not using a level during installation. A shelf that’s even a quarter-inch off-level looks noticeably crooked when you’re standing in front of it every day. Use a bubble level — not your phone’s level app, which drifts. Takes 30 extra seconds and saves significant frustration.
4. Overloading beyond weight capacity. Every shelf has a rated capacity — typically stamped on the box or listed in the product description. Exceeding it doesn’t just risk dropping the shelf; it can pull the wall anchor out of the drywall and take a chunk of wall with it. Check the capacity before loading heavy items.
5. Mismatching finishes across the apartment. Oak shelves in the bedroom, black metal shelves in the kitchen, white shelves in the bathroom, and natural pine in the living room reads as chaotic in a small apartment where multiple rooms are visible from a single point. Pick one or two finishes and stick to them throughout.
6. Using shelves as overflow storage for things that belong in drawers. Floating shelves are for curated display and accessible daily items — not for stuff you’d normally hide in a cabinet. If a shelf turns into a landing zone for charging cables, random cords, spare change, and mail you haven’t dealt with, it makes the room feel messier than no shelf at all would have.
7. Ignoring the wall when choosing shelf color. A natural wood shelf on a cream wall looks intentional. That same shelf on a deeply colored wall (navy, forest green, charcoal) can disappear or clash. Before buying, hold a swatch of the shelf material up against your wall in natural light and check that the combination reads as deliberate.
FAQ: Floating Shelves Ideas for Small Apartments
Can you put floating shelves in a rental apartment?
Yes — floating shelves are completely renter-friendly when installed correctly. Traditional stud-mounted shelves leave small holes that most landlords consider normal wear and tear, and are easy to patch with spackle before move-out. If you want zero wall damage, Command adhesive shelf systems are designed specifically for rentals and hold up to 16 pounds without any drilling. For medium-weight shelves, steel pin anchors leave holes smaller than a finishing nail that you can fill with white toothpaste on move-out. Know your lease: most leases allow small nail holes, but some specifically prohibit anything beyond picture hooks. If yours restricts wall modifications, go the Command strip route.
How deep should floating shelves be for a small apartment?
Shelf depth depends on the room and intended use. For bathroom and entryway shelves — where depth protruding into a narrow space creates a bump hazard — 6 to 8 inches is ideal. For bedroom floating nightstands and living room display shelves, 8 to 10 inches gives you a comfortable surface area for a lamp, books, and decor without feeling overwhelming. Kitchen shelves benefit from 10 to 12 inches deep if you’re storing dishes or larger items. The rule of thumb: use the minimum depth that serves the function. A 6-inch shelf that does the job looks cleaner than a 12-inch shelf in a space that doesn’t need the extra surface.
How do you style floating shelves in a small apartment?
The most reliable styling approach for floating shelves in small apartments is the rule of three: group items in odd numbers — one tall element, one medium, one low — with intentional negative space between groups. Keep colors to two or three recurring tones so the shelf reads as curated rather than random. Include at least one living plant per shelf to add organic movement. And resist the urge to fill every inch: negative space on a shelf makes a small apartment feel calmer and larger. Edit ruthlessly — if something on the shelf isn’t beautiful or functional, it belongs in a cabinet.
How many floating shelves do I need for a small apartment bedroom?
For most small apartment bedrooms, two to four floating shelves is the right number. Two shelves — one on each side of the bed at nightstand height — replace your nightstands and free up floor space on both sides. A third shelf above the headboard adds a display ledge for art and plants without making the room feel closed in. If you have an empty wall opposite the bed, a vertical column of three to four shelves creates a mini bookcase without the floor footprint of actual furniture. More than four or five shelves in a small bedroom starts to feel claustrophobic, so stop before you hit that threshold.
What is the weight limit for floating shelves in an apartment?
Weight capacity for floating shelves depends on two things: the shelf’s own rated capacity (printed on the box) and your installation method. Command adhesive shelves typically hold 10 to 16 pounds. Pin anchor installations handle 20 to 35 pounds per shelf. Standard drywall anchors support 25 to 50 pounds each, and stud-mounted shelves can hold well over 100 pounds. Most decorative floating shelves rate for 22 to 33 pounds — enough for a small lamp, a plant, and books without issue. Always stay below the rated capacity by at least 20 percent to account for the cumulative load over time, especially in apartments where walls may be thinner drywall rather than plaster.
Final Thoughts on Floating Shelves Ideas for Small Apartments
The best floating shelves ideas for small apartments all start from the same premise: your walls are the most underutilized resource in your home. While furniture fights for floor space, your walls sit mostly empty — and every blank wall in your apartment is an opportunity for storage, display, and design that costs less than most furniture alternatives.
Start with one room and one wall. Pick the spot where clutter accumulates most — the kitchen counter, the nightstand pile, the entryway floor — and solve that specific problem first. Once you see how much a single floating shelf changes that space, the rest of the apartment will start suggesting its own opportunities. Two shelves in the bedroom become three. A single kitchen shelf becomes an open shelving wall. A corner you ignored for two years becomes a plant tower.
You don’t need to overhaul your apartment in a weekend. Buy one set of shelves, get the installation right, style it with intention, and live with it for a week before deciding what’s next. Small, deliberate changes — done well — transform a rental into a space that feels genuinely yours.